
The BIOS firmware is one of those invisible but vital elements that makes a computer tick. When you hit the power button, before the operating system even stirs awake, the BIOS springs into action, initializing your motherboard, testing memory, detecting drives, and ensuring your CPU is ready to go. Without it, your PC wouldn’t even know how to boot.
Yet, this seemingly small program sometimes needs an update. Known as flashing the BIOS, the process replaces your existing firmware with a new version. Done correctly, it can fix bugs, improve system stability, patch security gaps, and enable support for new hardware. Done incorrectly, however, it can leave your machine as lifeless as a brick.
This guide combines the technical know-how with practical advice, so you can learn how to flash BIOS confidently, while keeping risks to a minimum.
What is BIOS and Why Does It Matter?
Before diving into the step-by-step process, it’s crucial to understand what BIOS is. The BIOS firmware resides on a small memory chip on your motherboard. It is the first code that runs when you power on your PC, conducting hardware checks before loading your operating system.
Flashing BIOS means rewriting this firmware with a newer version provided by your motherboard’s manufacturer. Reasons for flashing may include:
- Adding support for new processors.
- Enhancing system stability.
- Fixing compatibility issues with RAM or GPUs.
- Patching security vulnerabilities.
While beneficial, it’s not something to do casually. A failed flash can leave your PC unbootable.
Why Flashing BIOS Is Not Routine
Unlike an app update or a firmware update for peripherals, flashing BIOS is not something to do casually. Think of it like heart surgery: necessary only when essential, but transformative when executed correctly.
Reasons to flash include:
- CPU compatibility: New processors often require updated microcode in BIOS.
- RAM stability: Firmware tweaks can resolve compatibility with high-frequency memory.
- Bug fixes: Some BIOS versions correct system stability issues like random crashes.
- Security patch: Vulnerabilities such as Spectre and Meltdown prompted firmware-level fixes.
- Overclocking improvements: Enthusiasts benefit from new voltage or multiplier options.
If your computer runs smoothly with no hardware upgrades, you might never need to flash at all.
Preparation Checklist Before Flashing BIOS
Preparation makes the difference between success and disaster. Here’s a checklist:
- Identify your motherboard model: Each BIOS file is unique. Flashing the wrong one could corrupt your system.
- Check current BIOS version: You can see it in BIOS setup or by typing
msinfo32in Windows. - Compare release notes: Only update if the new BIOS addresses something relevant to you.
- Download directly from manufacturer’s site: Never trust third-party sources.
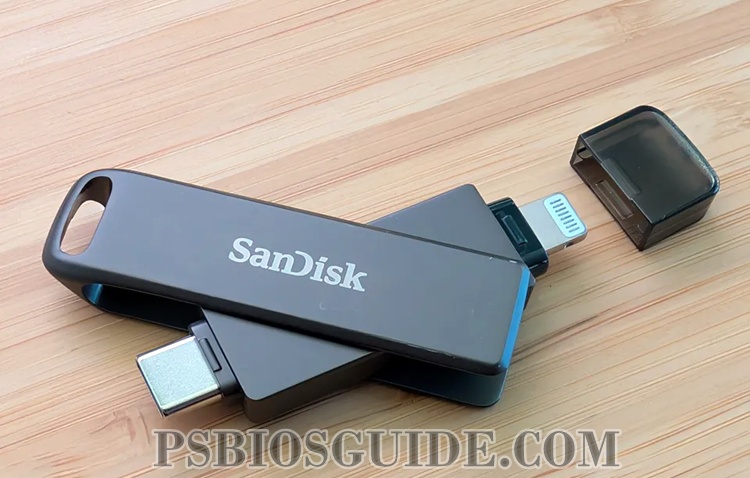
- Prepare a USB drive formatted in FAT32: This is the most universal medium.
- Ensure power stability: A UPS (uninterrupted power supply) is ideal.
With these precautions, you reduce the risk of a failed update.
How to Flash BIOS? (4 Methods)
There are multiple approaches, and the right one depends on your hardware.
1. Flashing BIOS via USB Drive (Recommended)
The USB drive method remains the gold standard. It bypasses the operating system entirely, lowering risks.
Steps:
- Download the BIOS update file for your specific motherboard.
- Extract the file and copy it to a freshly formatted USB drive.
- Reboot and enter the BIOS setup (keys vary: DEL, F2, F10, ESC).
- Locate the BIOS utility (names include EZ Flash, Q-Flash, M-Flash, etc.).
- Select the update file from the USB.
- Start flashing and wait until the process finishes completely.
Never interrupt the flash once it starts.
2. Flashing BIOS Through Windows Utility
Some vendors provide a Windows application for updating. ASUS has AI Suite, MSI has Live Update, Gigabyte has App Center, and so on.
Advantages:
- User-friendly interface.
- Minimal manual intervention.
Drawbacks:
- Riskier than the USB method because Windows instability can interfere.
- Background tasks may cause corruption.
It’s best used only if you trust the stability of your OS.
3. Flashing BIOS Directly Over the Internet
High-end boards allow flashing directly through the boot menu if connected to the internet. The motherboard downloads the latest BIOS and installs it.
Pros:
- Extremely convenient.
- No need for a USB drive.
Cons:
- Internet interruptions can cause failure.
- Not available on all boards.
4. BIOS Flashback and Dual BIOS Features
Some modern boards come with BIOS flashback or dual BIOS:
- Dual BIOS: If one fails, the other takes over.
- BIOS flashback: Lets you flash firmware even without CPU or RAM installed.
These features make flashing significantly safer, especially for enthusiasts upgrading to next-gen CPUs.
What to Expect After Flashing BIOS
When the update completes, your system may reboot several times. BIOS will often reset settings to default. Expect to:
- Reconfigure boot order.
- Re-enable XMP profiles for high-speed RAM.
- Adjust overclocking parameters if previously set.
Treat the first boot like setting up your PC anew, double-check every configuration.
Risks and Common Mistakes
Flashing is safe when done carefully, but risks exist:
- Flashing the wrong BIOS firmware.
- Power loss during the update.
- Removing the USB drive mid-process.
- Using an incorrect BIOS utility for your brand.
Avoid these mistakes by following manufacturer guidelines word for word.
Recovering from a Failed BIOS Flash
Sometimes, despite precautions, things go wrong. Recovery methods include:
- Clearing CMOS by removing the battery or using a jumper.
- Using built-in BIOS recovery utilities.
- Leveraging dual BIOS if available.
- Contacting the manufacturer for a replacement chip.
A failed BIOS flash isn’t always the end, but recovery can be tedious.
Advanced Tips for Enthusiasts
For those who want maximum control:
- Checksum verification: Some vendors provide hashes for BIOS files. Validate them before flashing.
- Stable overclocking: Flashing to a new BIOS might unlock advanced multipliers or better voltage control.
- Testing with stress tools: After flashing, run programs like Prime95 or MemTest to confirm system stability.
- Keep backups: Save your old BIOS version if the vendor allows rollbacks.
These steps ensure both performance and security are maximized.
Benefits of Flashing BIOS Correctly
When executed properly, flashing BIOS delivers tangible benefits:
- Broader hardware support.
- Improved CPU compatibility.
- Enhanced system stability.
- Patched vulnerabilities with security patches.
- Smoother overclocking experiences.
Your PC remains future-ready and resilient against evolving needs.
Frequently Asked Questions (FAQs)
Is Flashing BIOS Safe?
Yes, if done carefully. Use the official firmware, stable power, and follow steps correctly. Boards with dual BIOS or BIOS flashback add extra safety.
How Long Does It Take to Flash BIOS?
Preparation may take 20–30 minutes, but the actual flashing lasts just 3–5 minutes. Avoid interrupting the process.
Can You Flash BIOS Without a CPU?
Yes, on modern boards with BIOS flashback. It allows updating using only power and a USB drive.
What Happens If a BIOS Flash Fails?
You may reset the CMOS, use BIOS recovery, or rely on a dual BIOS chip. Worst case: replace the BIOS chip.
Do You Need to Flash BIOS Regularly?
No. Flash only when necessary—for CPU compatibility, stability issues, or critical security updates.
Will Flashing BIOS Improve Performance?
Not directly. But it can enhance overclocking stability, memory support, and hardware efficiency.
Does Flashing BIOS Erase Data?
No, it only resets BIOS settings. Your files and operating system remain untouched.
Conclusion
Learning how to flash BIOS is not just about following steps; it’s about understanding the delicate role firmware plays in your system. By preparing carefully, using the correct method, and avoiding common pitfalls, you can update your BIOS safely and unlock new levels of performance and compatibility.
The key takeaway? Flash BIOS only when necessary, but when you do, follow best practices meticulously. Done right, the update secures your hardware investment, enhances efficiency, and ensures your PC is ready for future upgrades.